
Ilastik for Object Classification#
In this section, we will explore how to use Ilastik for object classification. This process is very similar to what we have done in the pixel classification section and still involves training a machine learning model. However, instead of classifying pixels, we will classify entire objects based on instance segmentation images.
In this exercise, we will use the instance segmentation data from the nuclei dataset that we generated from the From Ilastik Masks to Labels exercise and train a model to separate cells into mitotic vs non-mitotic states. We will also need the raw data from the DAPI dataset we used to generate the instance segmentation images.
Ilastik Object Classification Workflow#
For detailed workflow instructions, you can refer to the Ilastik Object Classification Documentation.
1. Select the Workflow#
When you open Ilastik, you will see the Startup Screen with various workflows.
There are two options for the Object Classification workflow:
Start from Pixel Predictions Map: You can use the probability maps generated with the Pixel Classification workflow, as Ilastik has a built-in way of converting probability map images to instance segmentation images.
Start from Segmentation: You can directly load pre-existing semantic or instance segmentation images.
For this exercise, we will use the Instance Segmentation images that we generated in the previous From Ilastik Masks to Labels exercise. Note that Ilastik’s object classification workflow can be used with segmentation results from any source, including Deep Learning approaches that we will explore later in this course.
Select the Object Classification [Inputs: Raw Data, Segmentation] workflow by clicking on it. You will be automatically brought to the Input Data step.

2. Load the Image Data#
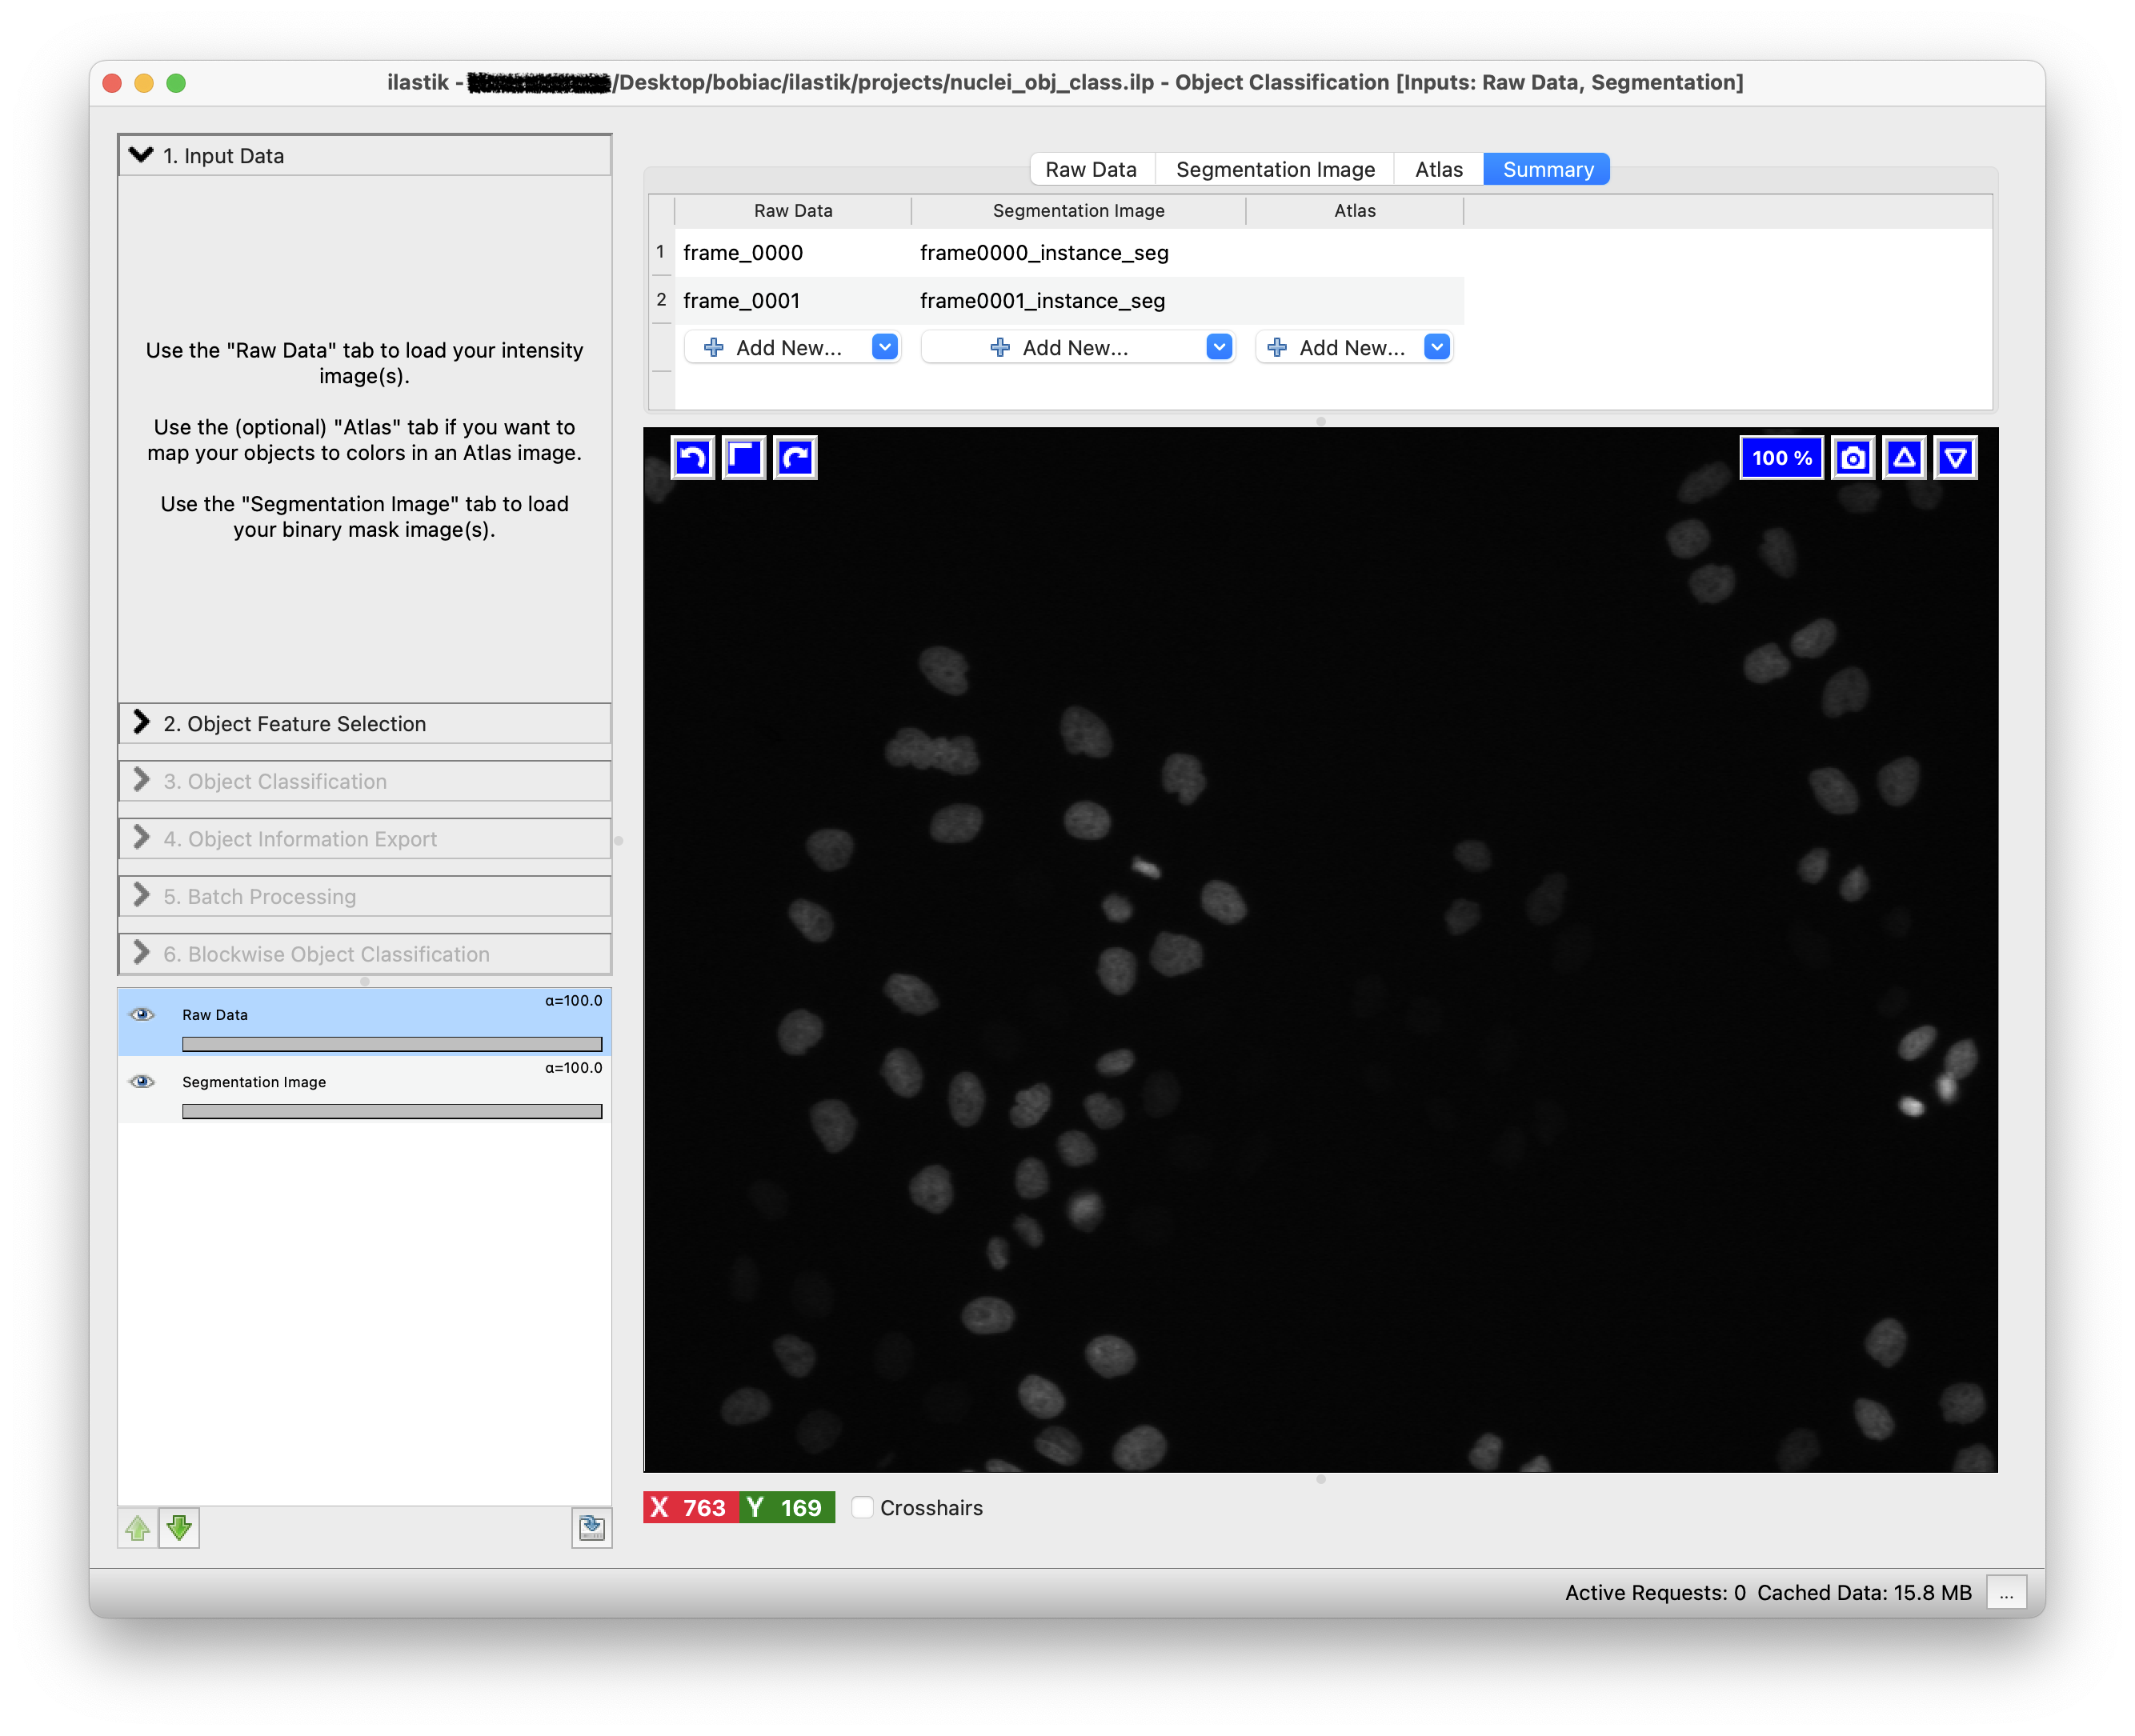
The data loading step is similar to the one in the Pixel Classification workflow (Drag and drop your image files into the Add New… field). However, in this case, we will need to load not only the raw data in the Raw Data tab, but also the instance segmentation images in the Segmentation Image tab. To create a robust classifier, you should load multiple images from the dataset.
It is important that the order of the images in both tabs matches, as Ilastik will use the instance segmentation images to identify and classify the objects in the corresponding raw data images. By clicking on the Summary tab, you can verify that the images are correctly paired.
3. Select the Features#
To continue, click on the Object Feature Selection step (on the left side of the GUI) and then on the Select Features button. Here, you can select the object features that will be used to discriminate between the different object classes.
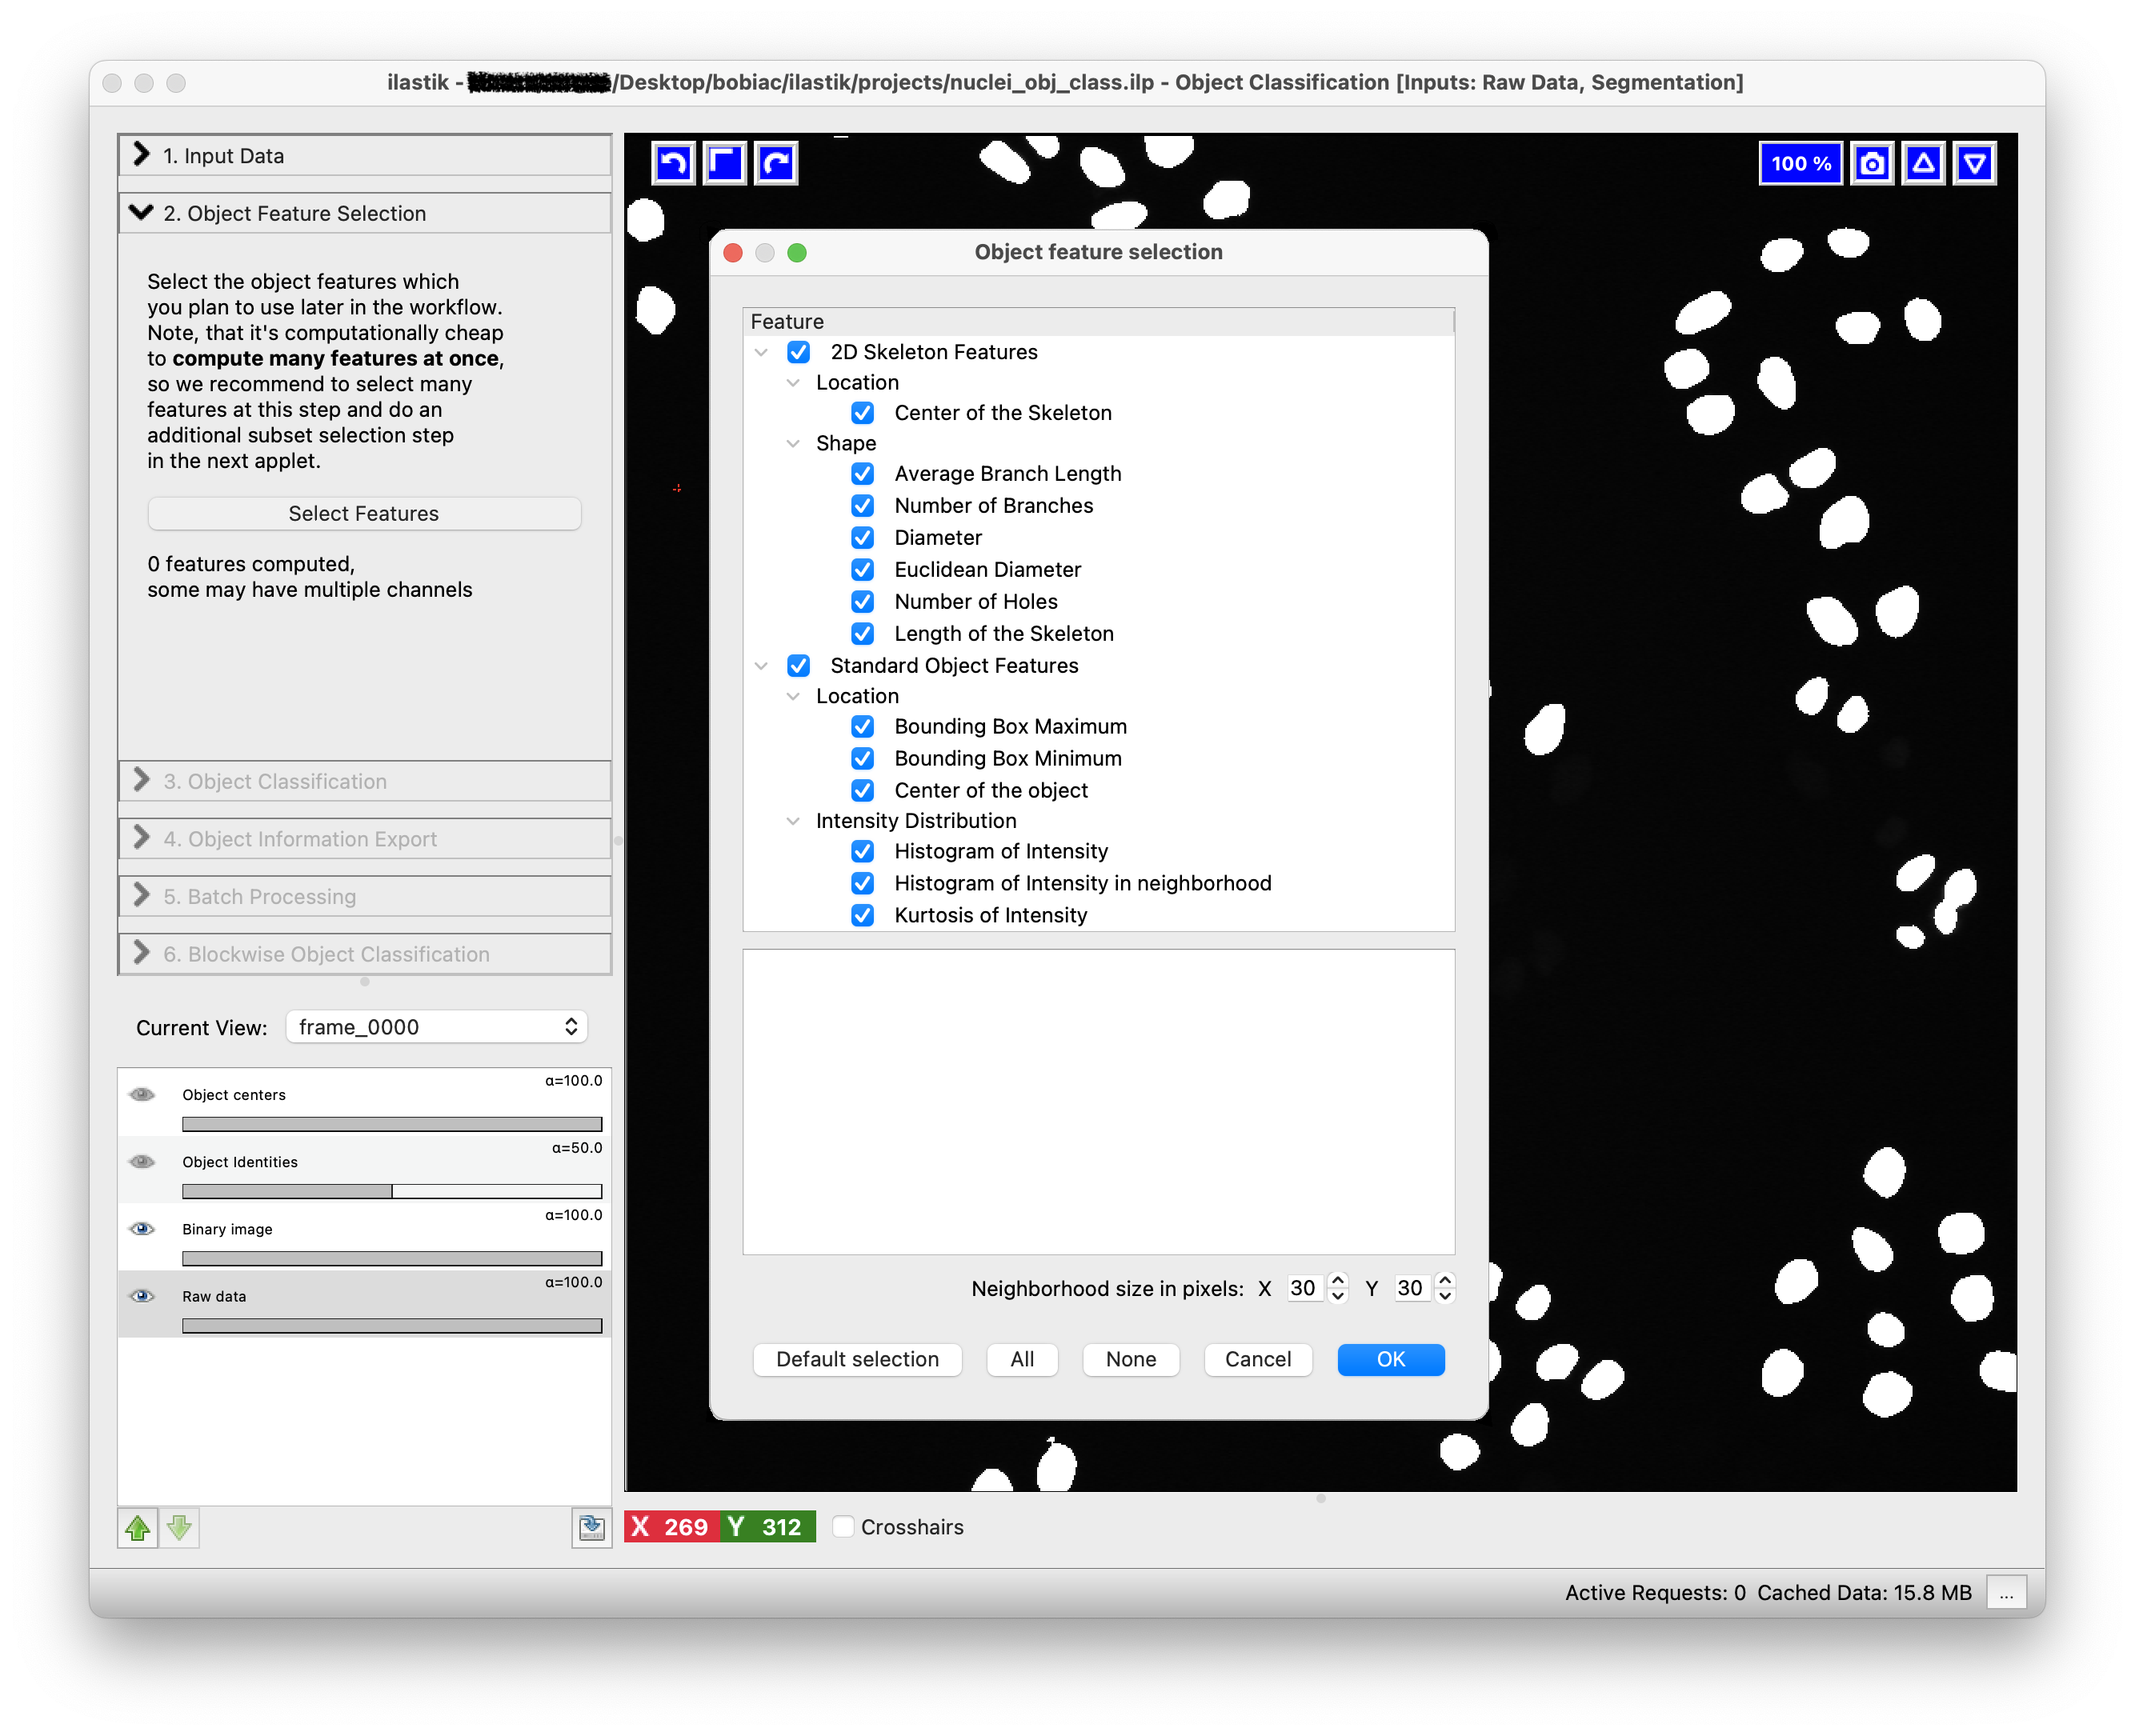
The goal of this exercise is to classify cells into mitotic vs non-mitotic states. By looking at the raw images, try to think about which features might be useful for this classification and select them accordingly. For example, you might want to select features related to the shape, intensity, and texture. By hovering over each feature, you can see a brief description of what it measures.
For a detailed feature overview, refer to this Ilastik documentation.
4. Train the Classifier#
The next step is to train the classifier. Similarly to the pixel classification workflow, this is an interactive process where you will need to label a few objects in the image with annotations to provide the classifier with examples of the different classes.
In the Training step (on the left side of the GUI) you can add, remove or edit the classes (labels) that you want to use for the classification. For this exercise, we will use two classes: mitotic and non-mitotic. To rename the default classes, Label 1 and Label 2, double-click on each class and type the new name (You can also change the class color by double-clicking on the color box next to the class name).
Now you can start by choosing a few objects in the image that correspond to the mitotic class: select the mitotic class, then select the Brush tool (should be the default) and click on one of the segmented nuclei that is in the mitotic state. To toggle the visibility on and off of the segmentation image, thus visualizing the raw data to correctly label the objects, you can press the i key on your keyboard. Next, repeat the process for the non-mitotic class, selecting some objects that correspond to the non-mitotic state.
- Use Cmd+Z (macOS) or Ctrl+Z (Windows) to undo the last action.
- Use the Erase tool to remove annotations.
- To navigate the image viewer, zoom in and out using the mouse wheel (or trackpad) together with the Cmd (macOS) or Ctrl (Windows) key, and pan the image with the left mouse button while holding down the Shift key.
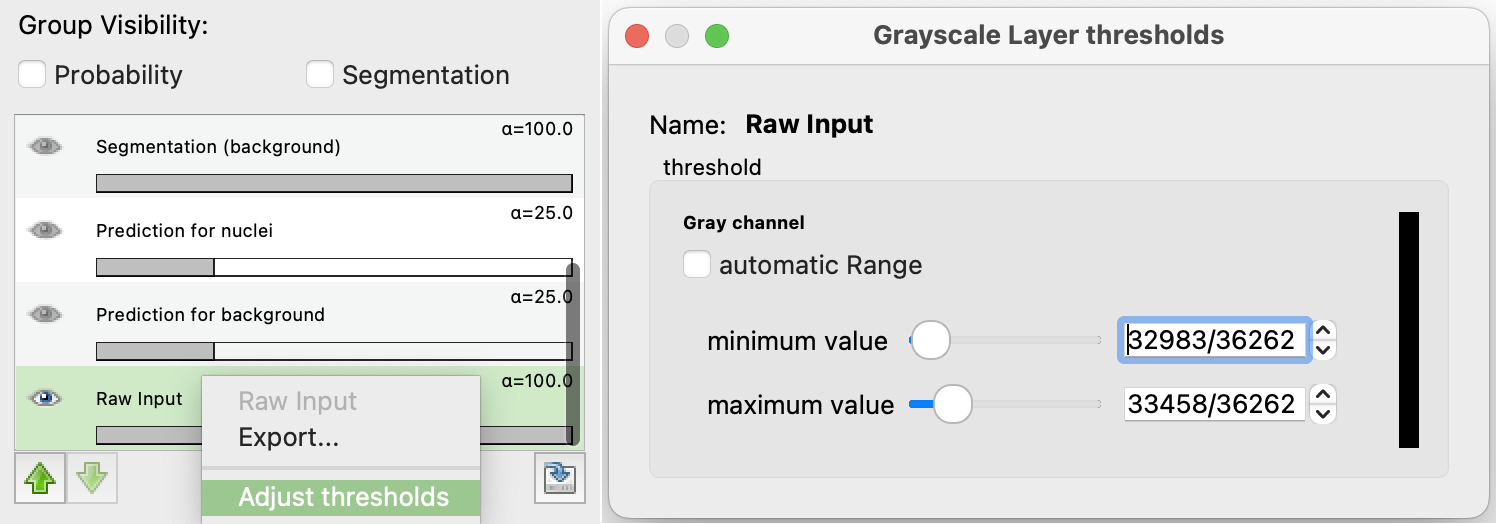
- To control brightness and contrast, right-click on Raw Input in the Group Visibility section (bottom left) and select Adjust thresholds to set the minimum and maximum display range.
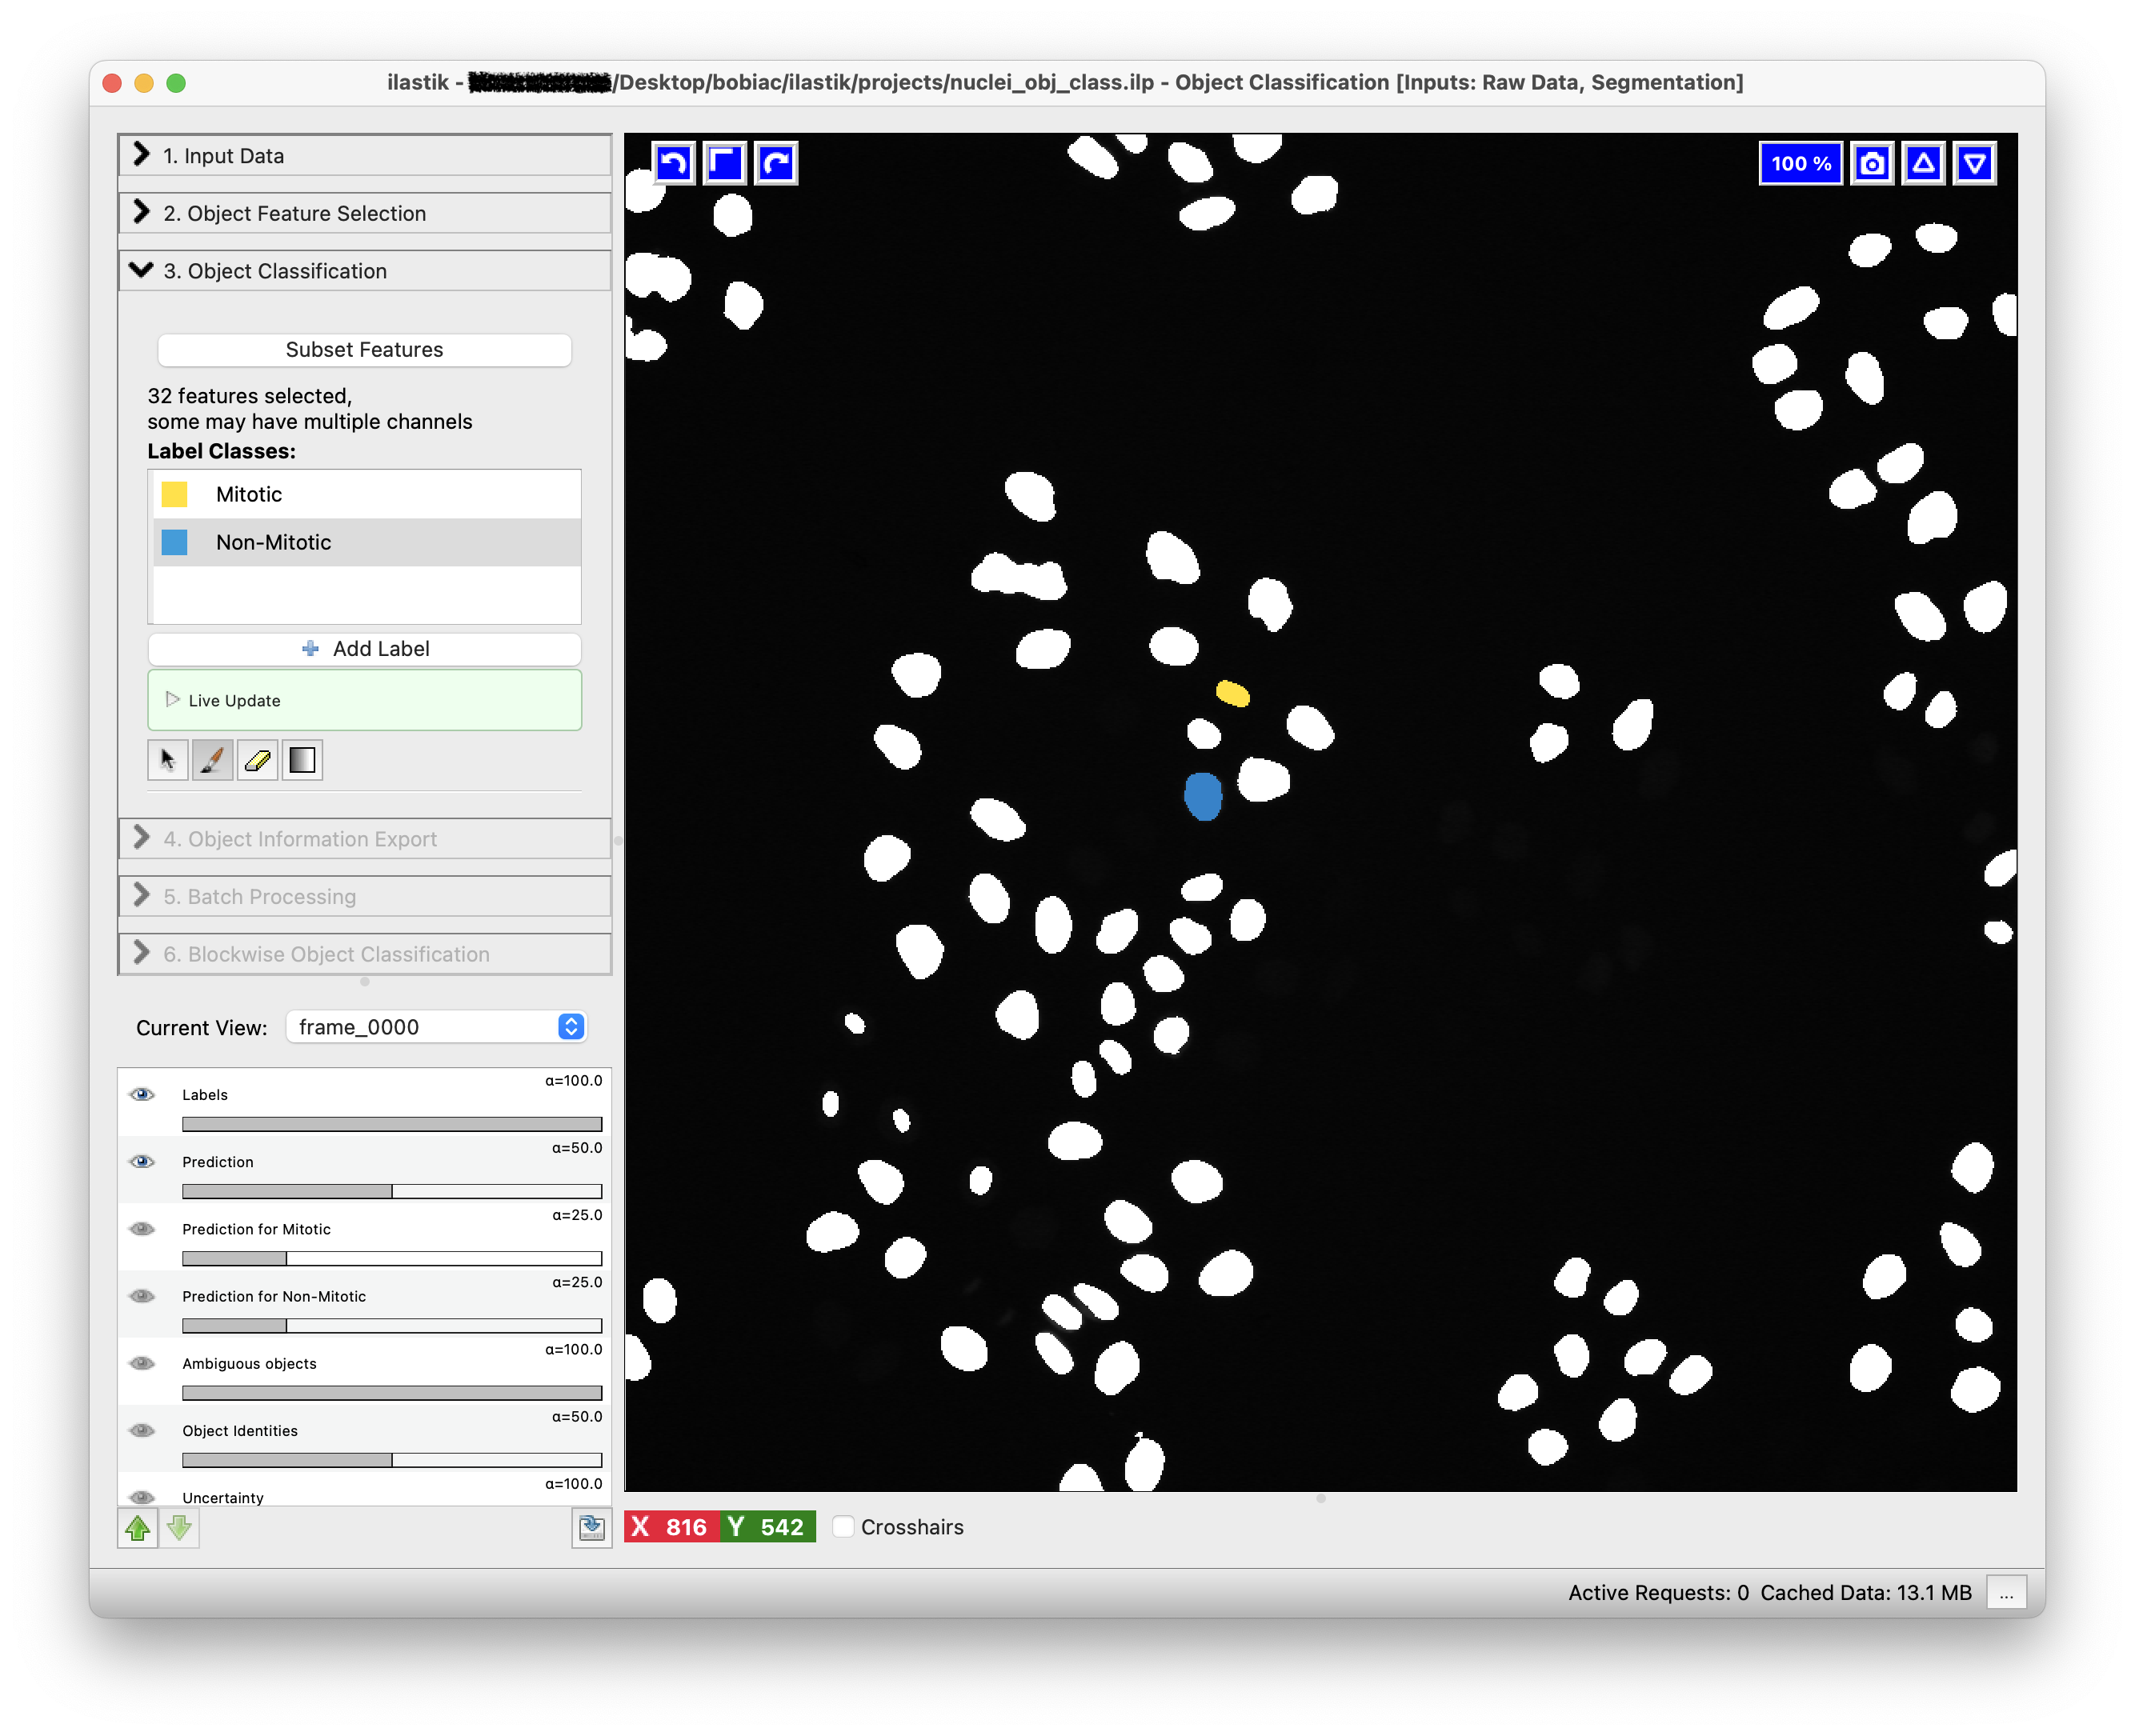
To train the classifier and see the predictions, press the Live Update button. This will update the predictions in real-time as you label more pixels.
The predictions will be displayed as an overlay on top of the image and colored according to the class colors you defined.
Examine the results for errors and add (or remove) annotations to correct.
Repeat the process of labeling objects (if necessary) and checking the predictions on all the images you loaded (you can switch between images using the Current View drop-down menu on the left side of the GUI).
Once you are satisfied with the results, you can proceed to the next step of exporting the results and batch processing the images.
5. Export the Results#
Once the trained model works well with all the training images, you can either export the results for the training images, or run the classifier in batch mode to process many images at once.
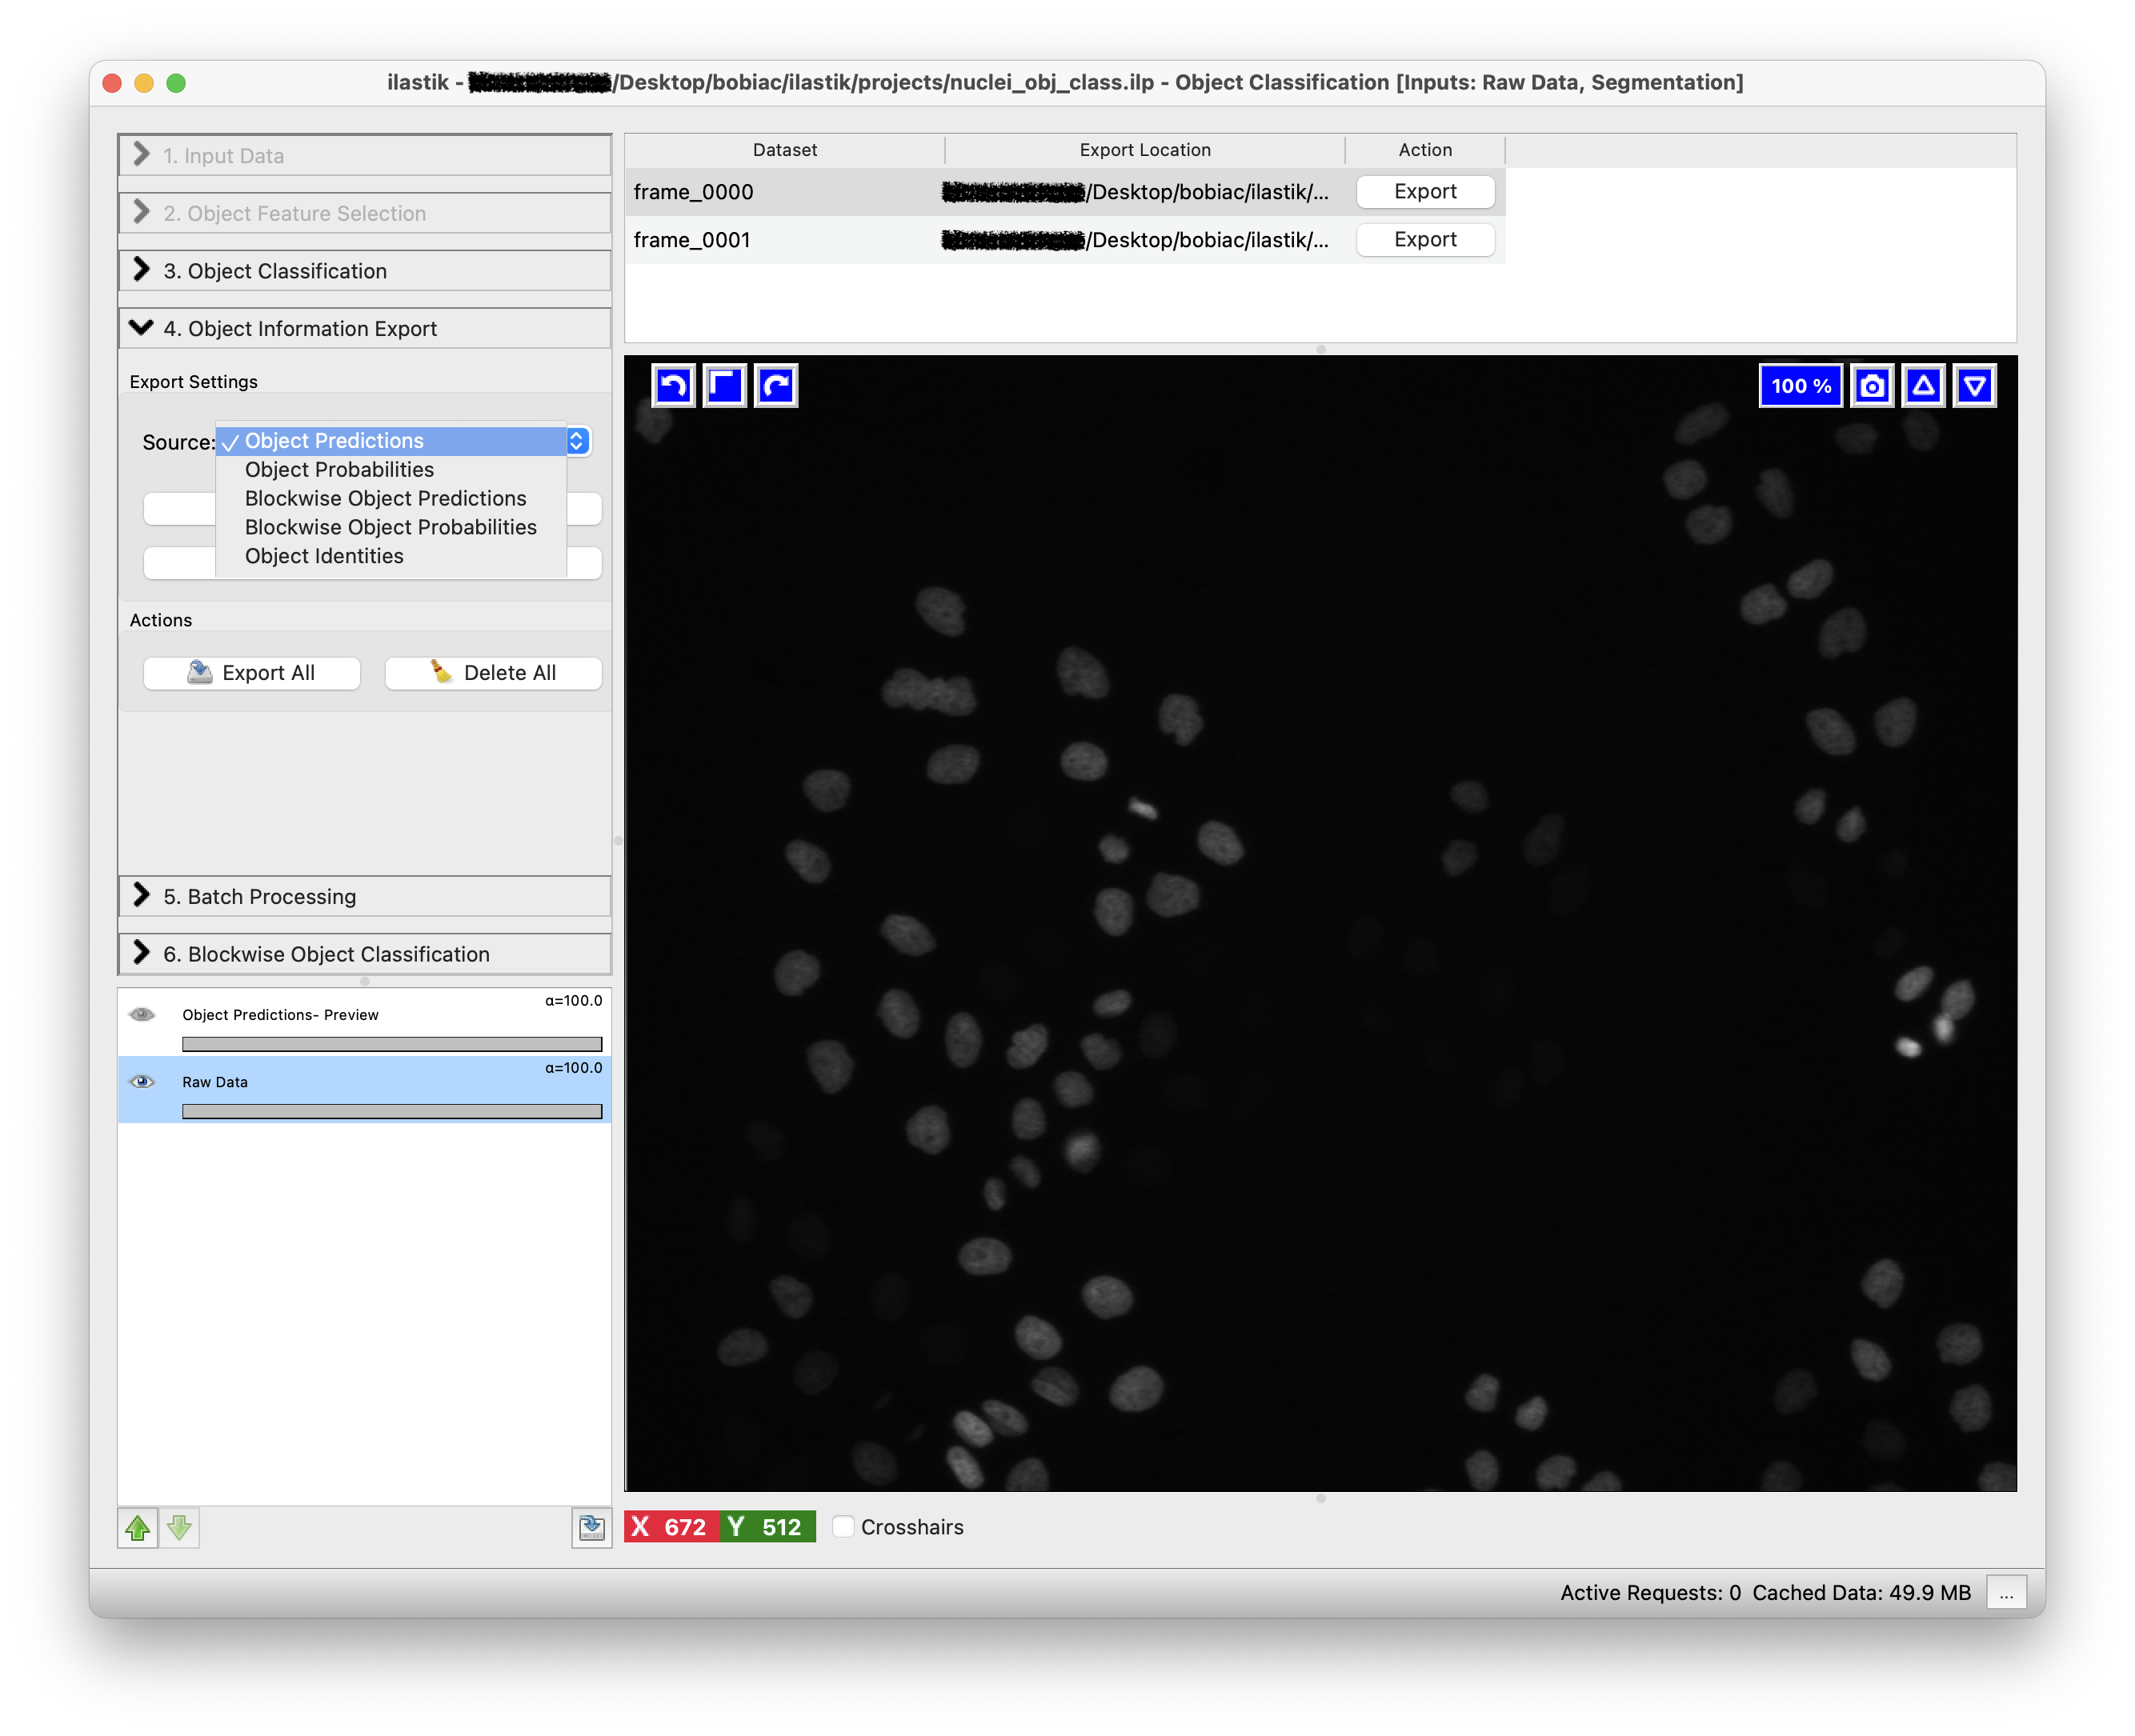
Either way, the first step is to select what you want to export by choosing an option in the Source drop-down menu in the Export Settings step (on the left side of the GUI). Different options are available, but for this exercise we want to export the Object Predictions. This will export new images where each object is assigned a value depending on the class it belongs to. In our case, all objects in the mitotic class will be assigned a value of 1, while all objects in the non-mitotic class will be assigned a value of 2 (because class 1 was assigned to mitotic and class 2 to non-mitotic).
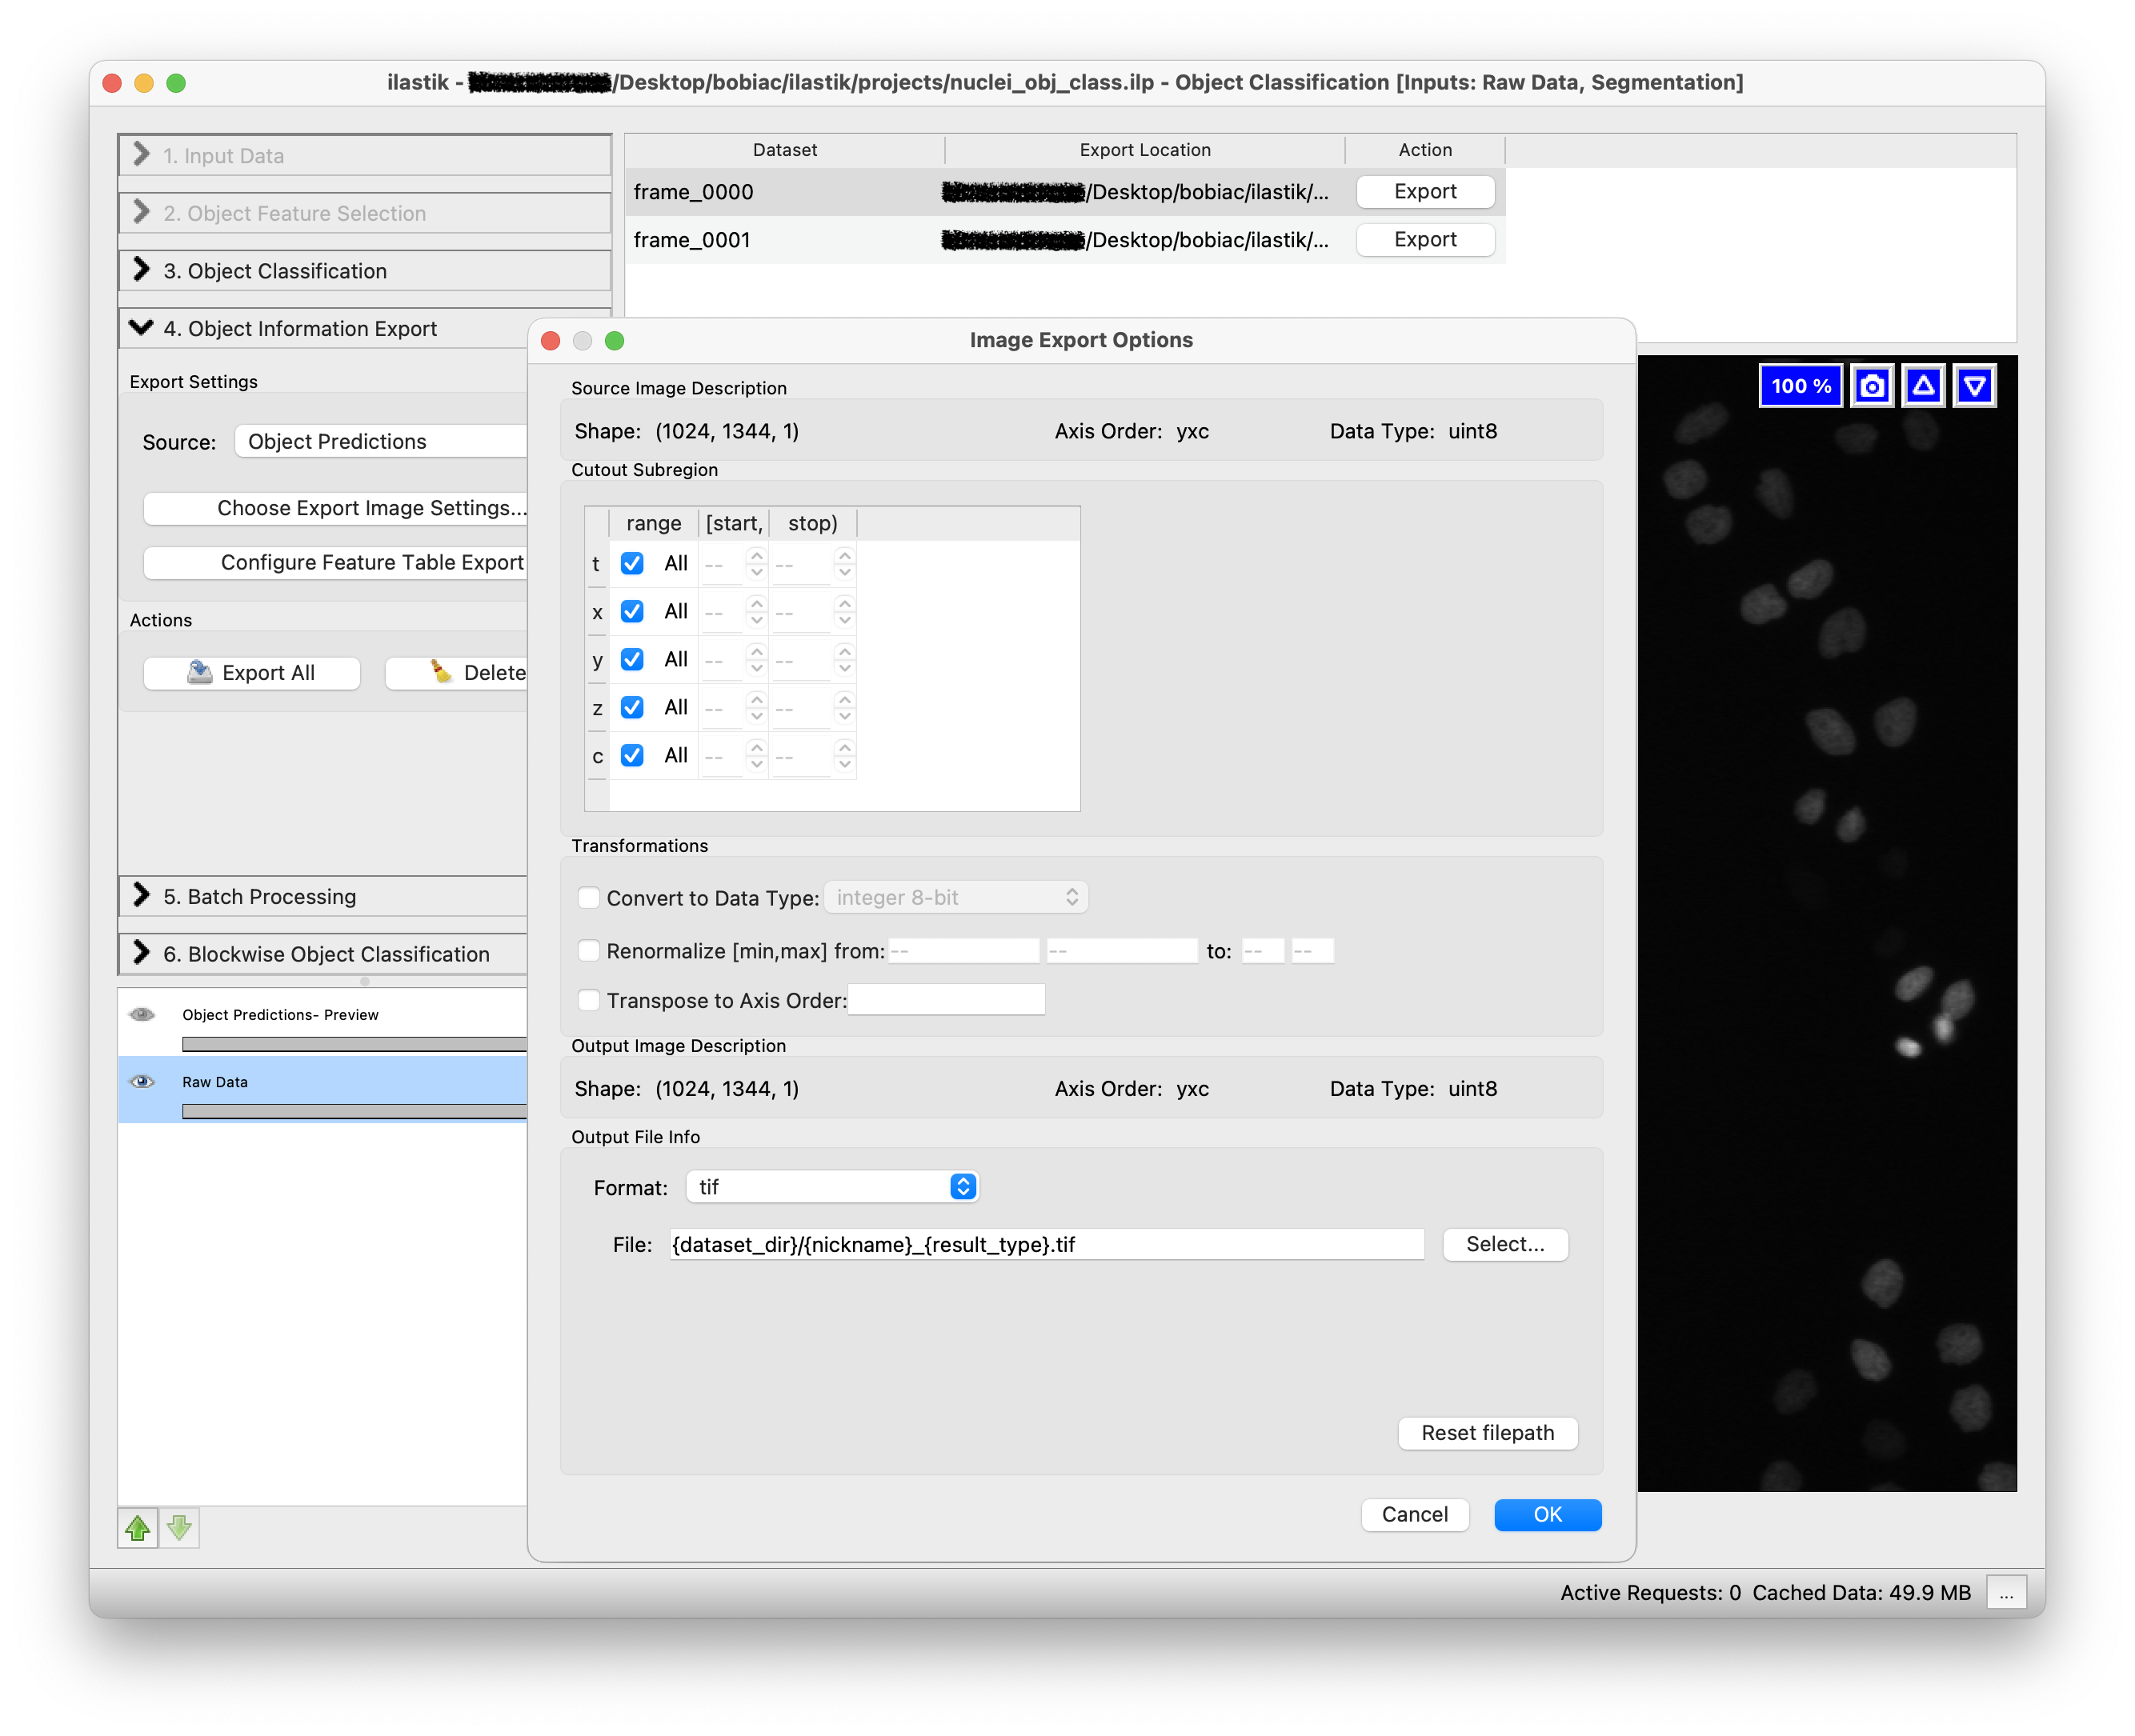
The second step is to select how we want to export the results. By clicking on the Choose Export Image Settings… button, a new window will open where you can select different options including the export format and the output folder to save the result. Select “tif” as the format and leave as default the output file path, since it automatically is set to save the results in the same folder as the input images. The files will also be saved with a suffix appropriately changing depending on the option you select in the Source drop-down menu (e.g. _Object Predictions). Leave the other options untouched since we do not need to change them for this exercise.
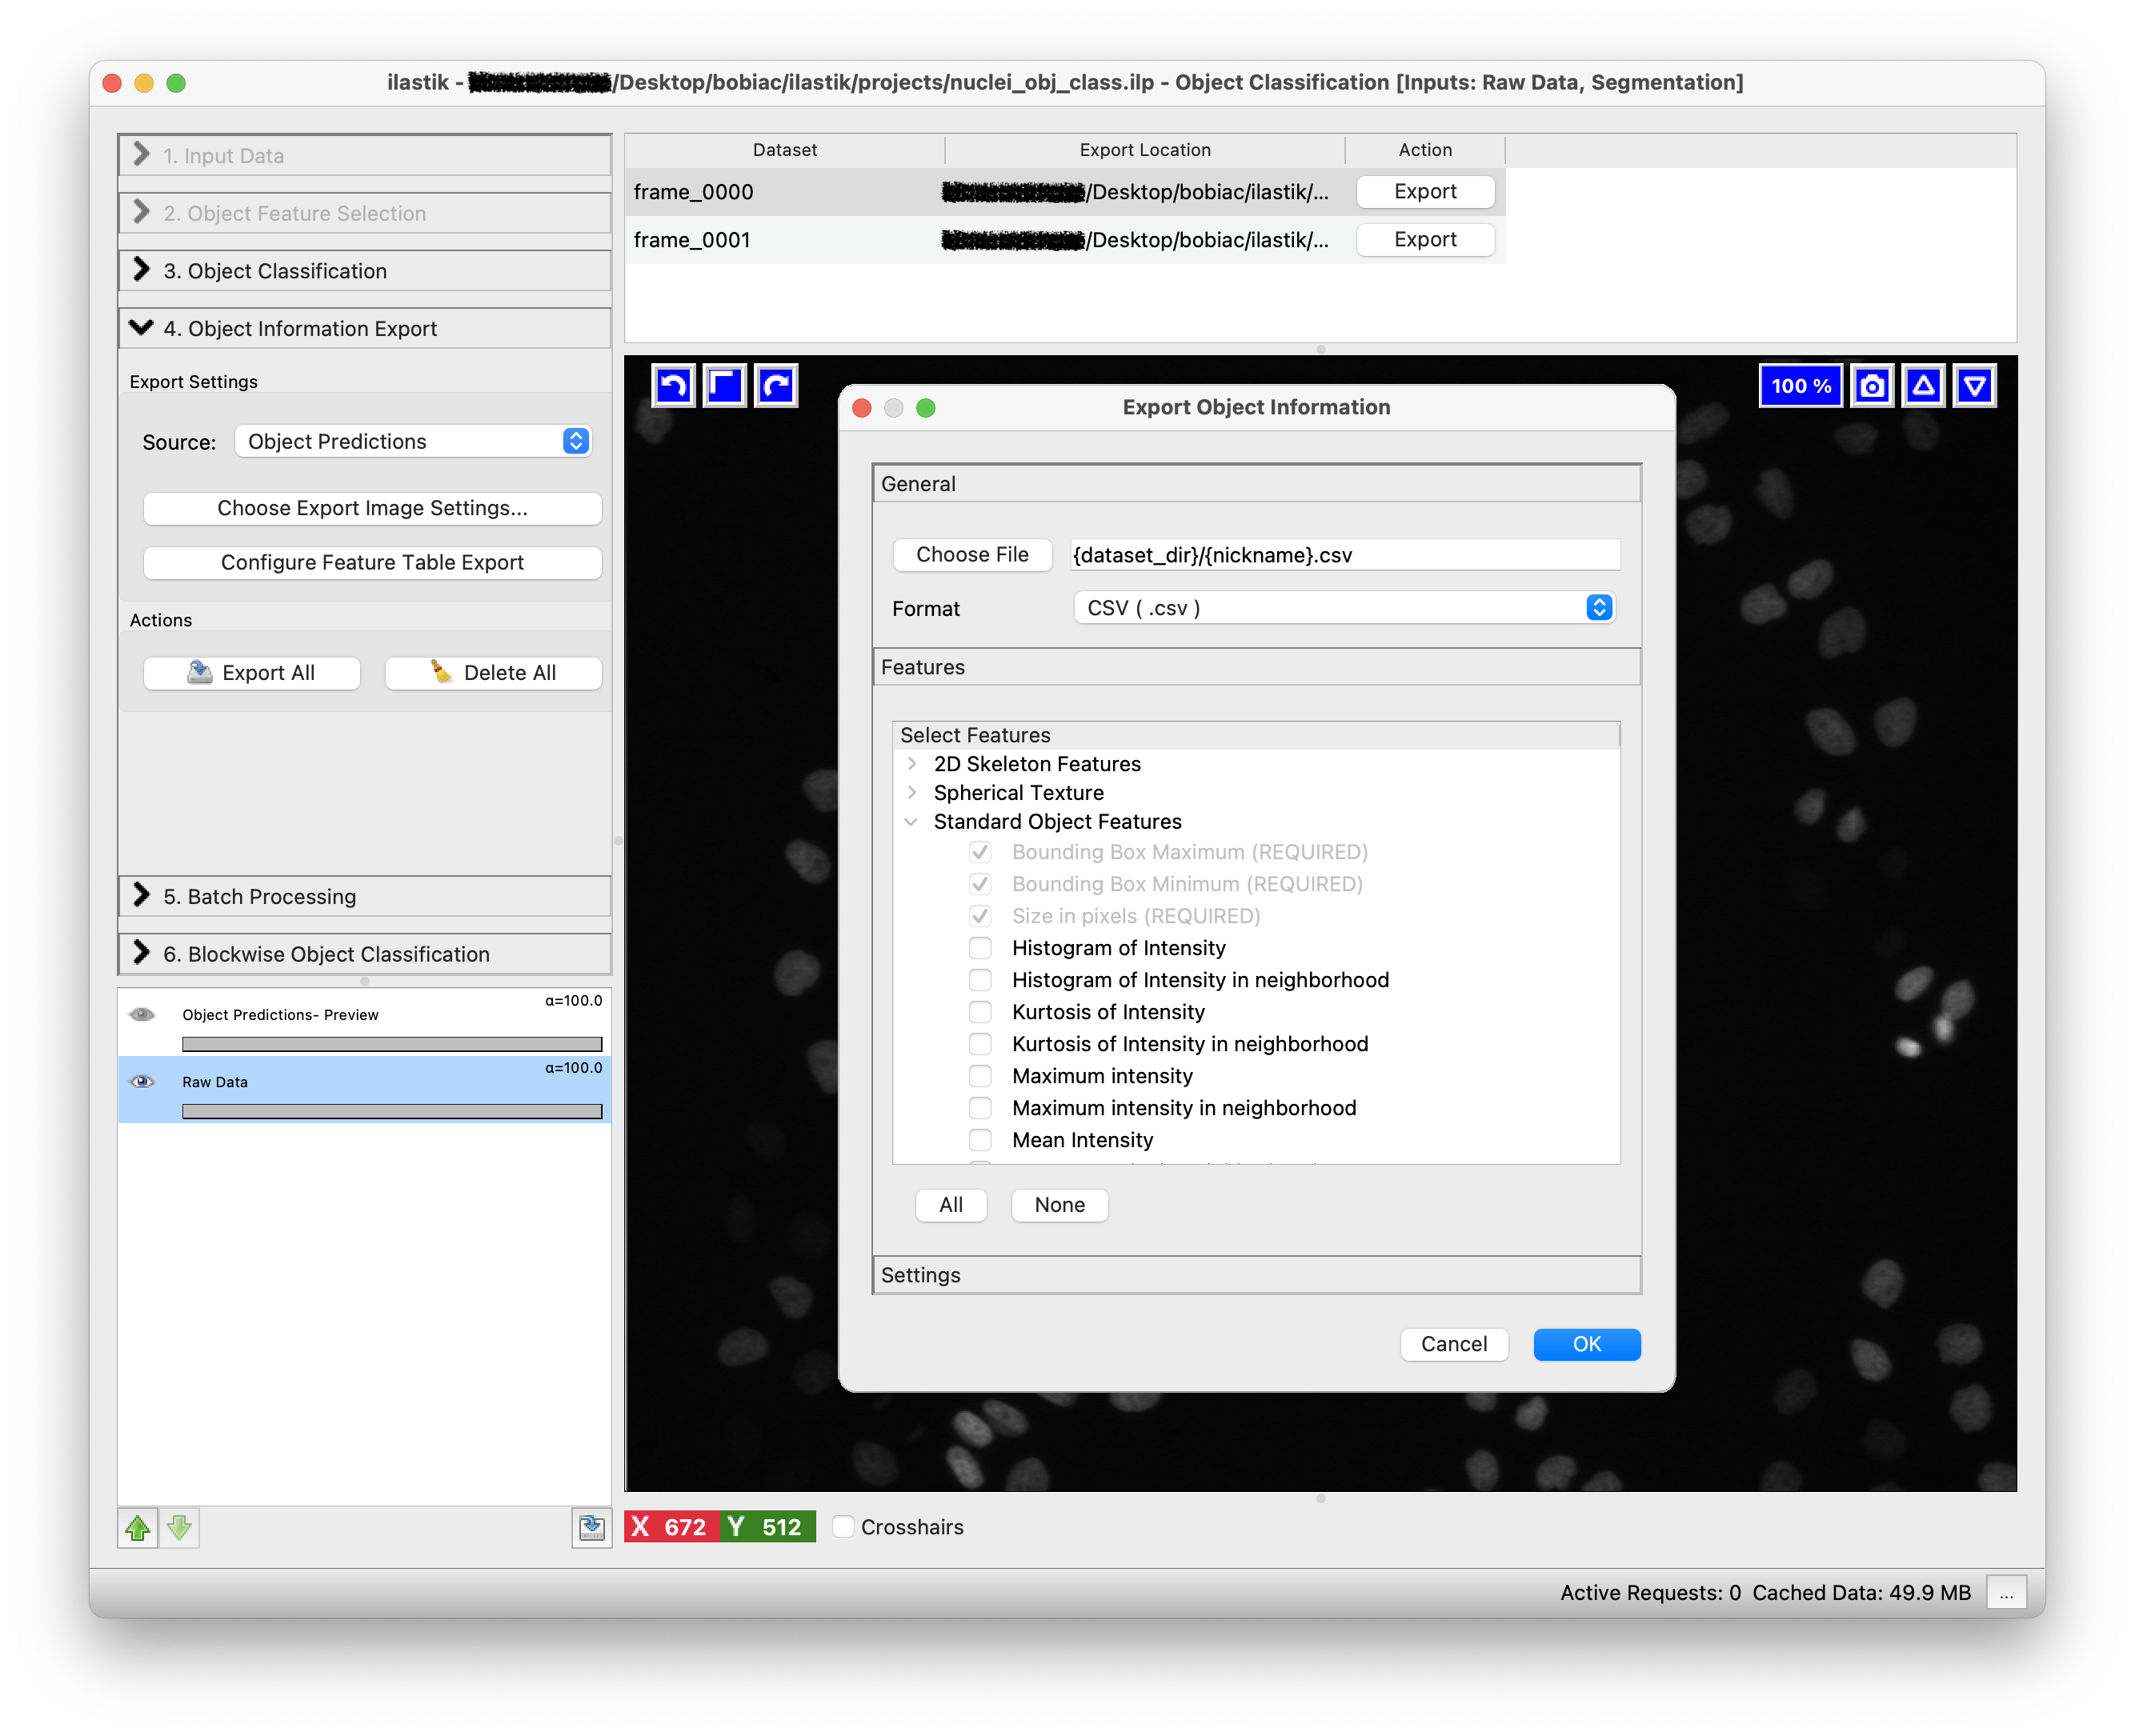
The third step is to select which features to include in the exported data table. This table will contain detailed measurements and feature values for each classified object. To do so, click on the Choose Feature Table Export button. A new window will open, where you can select where to save the table and which features to include. For this exercise, we will focus on the image outputs, but you can optionally export specific features if you want to explore the quantitative data.
Click on the Export All button to start exporting the object predictions for all the training images. If you look in the folder where your training images are stored, you will find the exported results with the suffix _Object Predictions.tif. In the folder where you had the instance segmentation images, you will find the generated table.

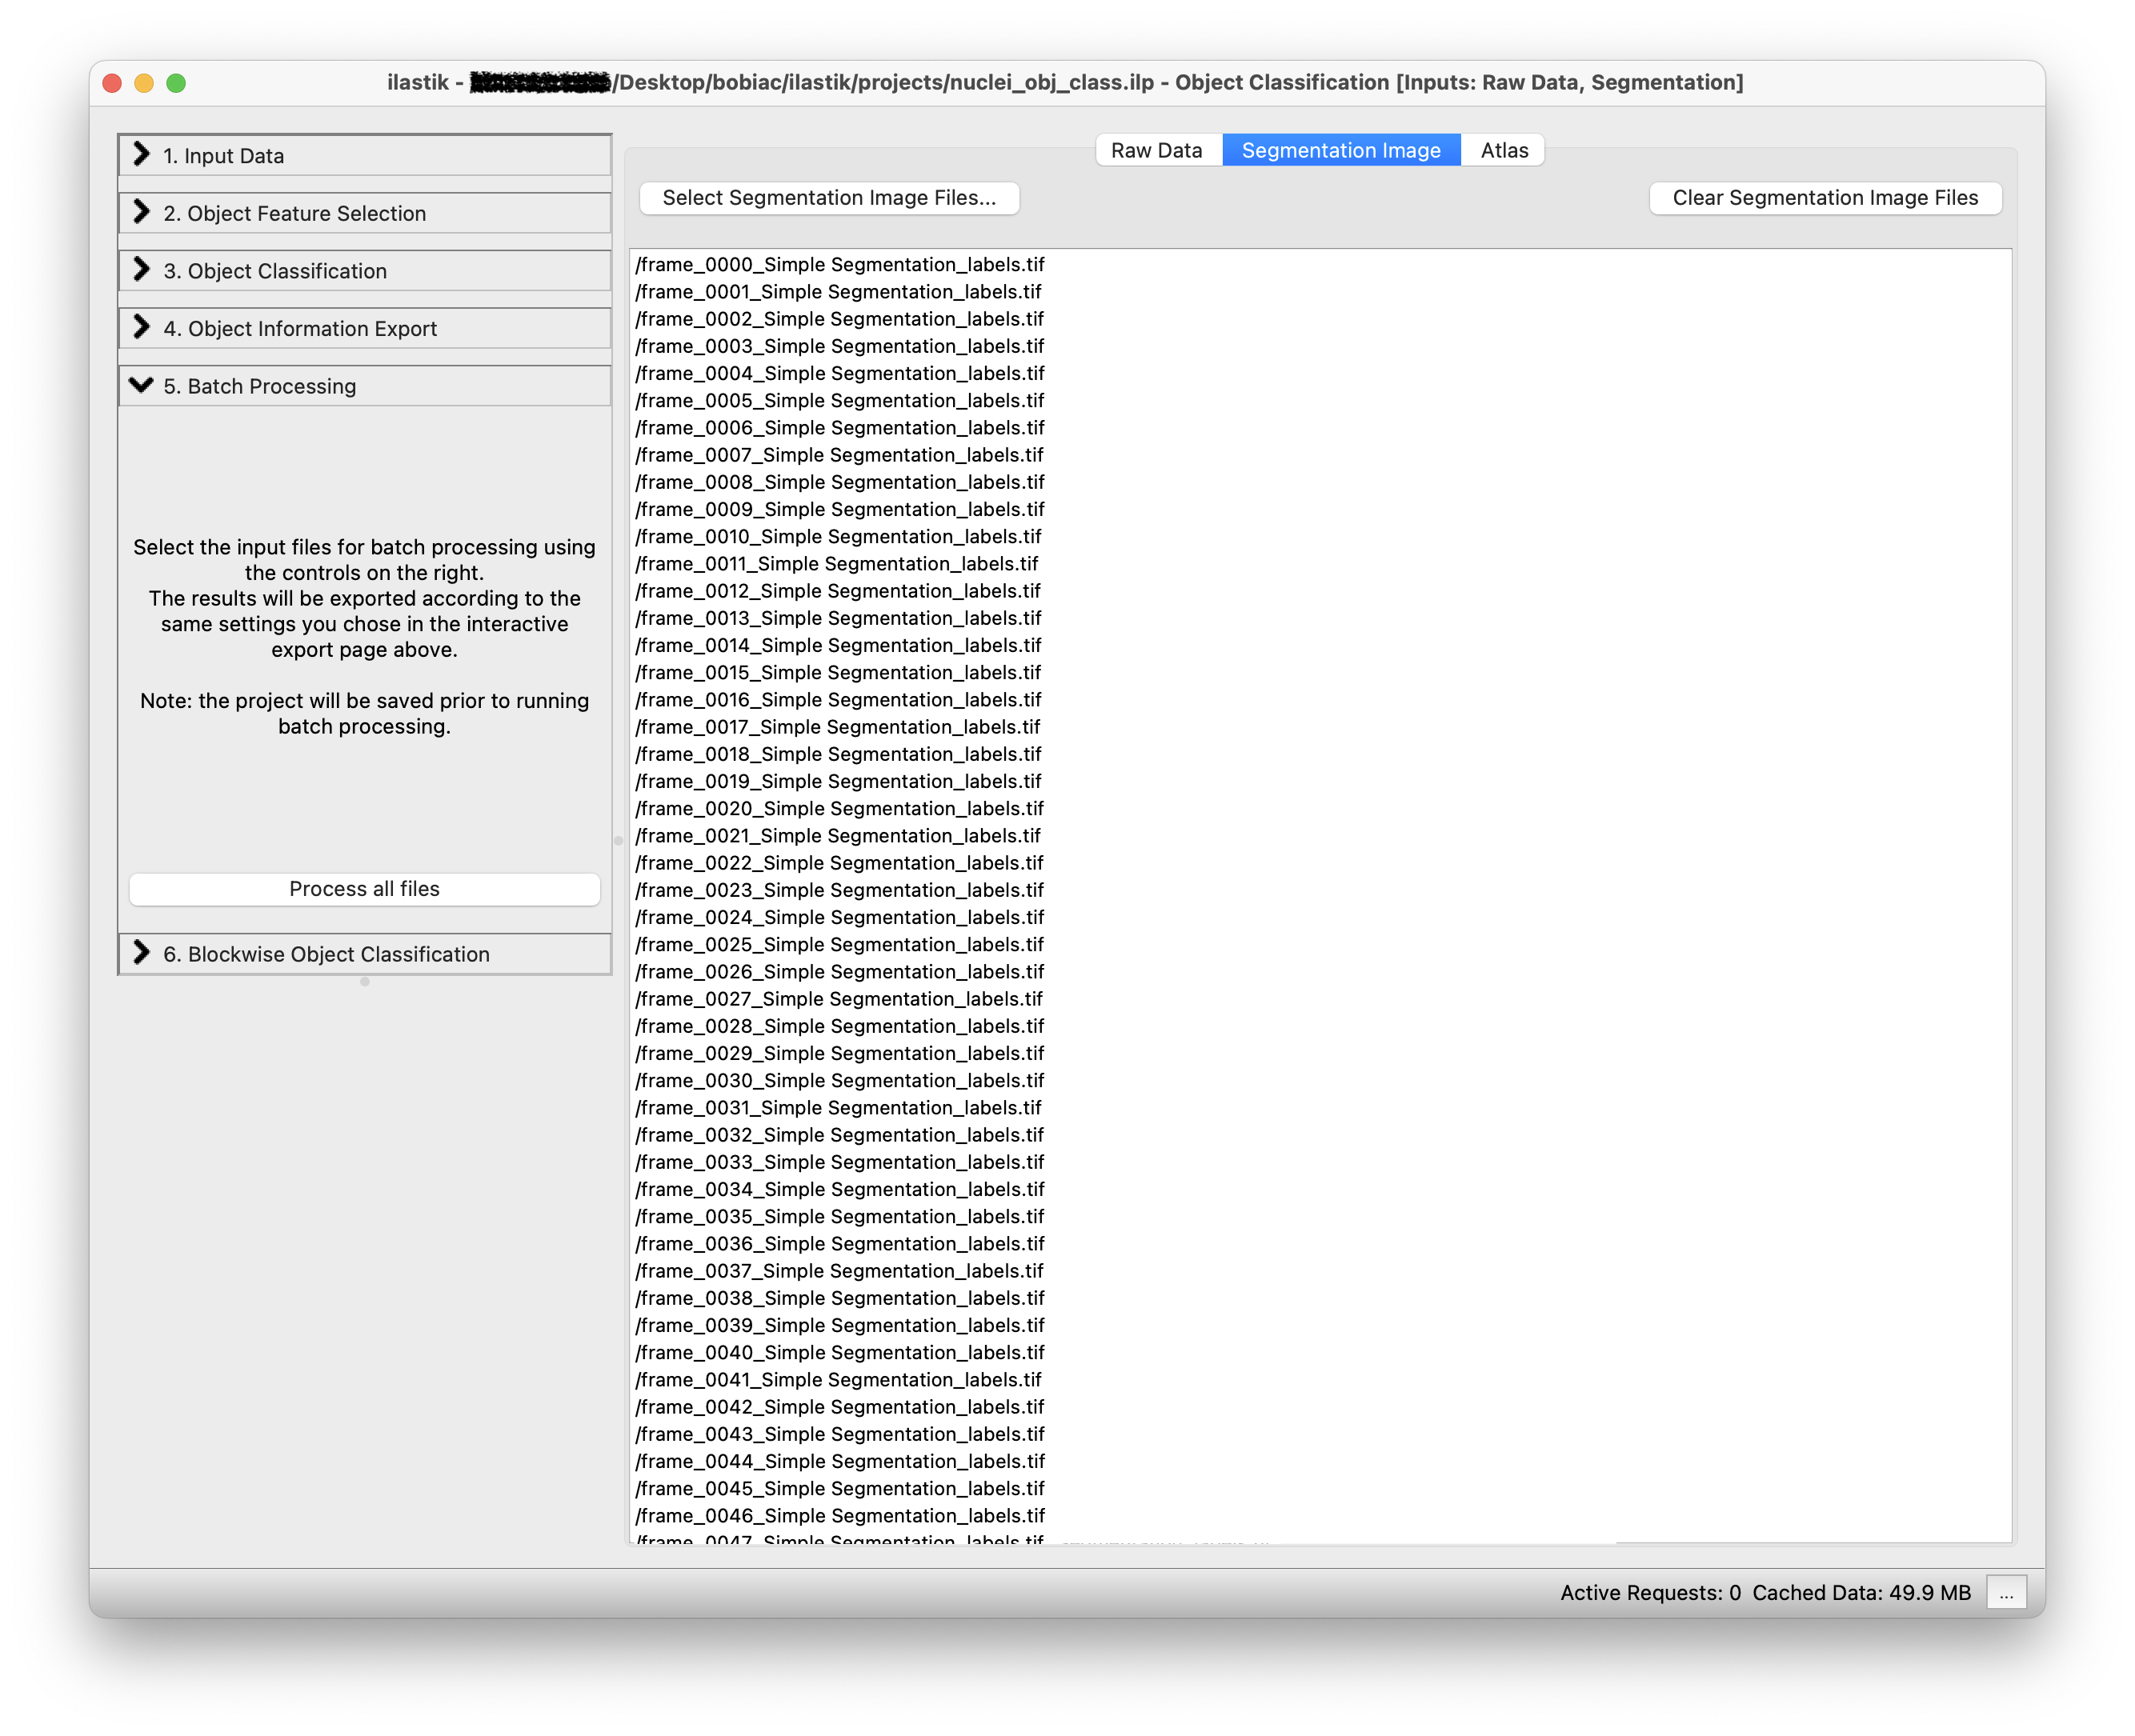
6. Batch Processing#
To process many images at once and run the classifier on all the images in the dataset you can select the Batch Processing step (on the left side of the GUI) and simply Drag and drop all the files in the dataset folder on the white area of the GUI. Remember to load the raw data in the Raw Data tab and the corresponding instance segmentation images in the Segmentation Image tab (it is important that the order of the images in both tabs matches).
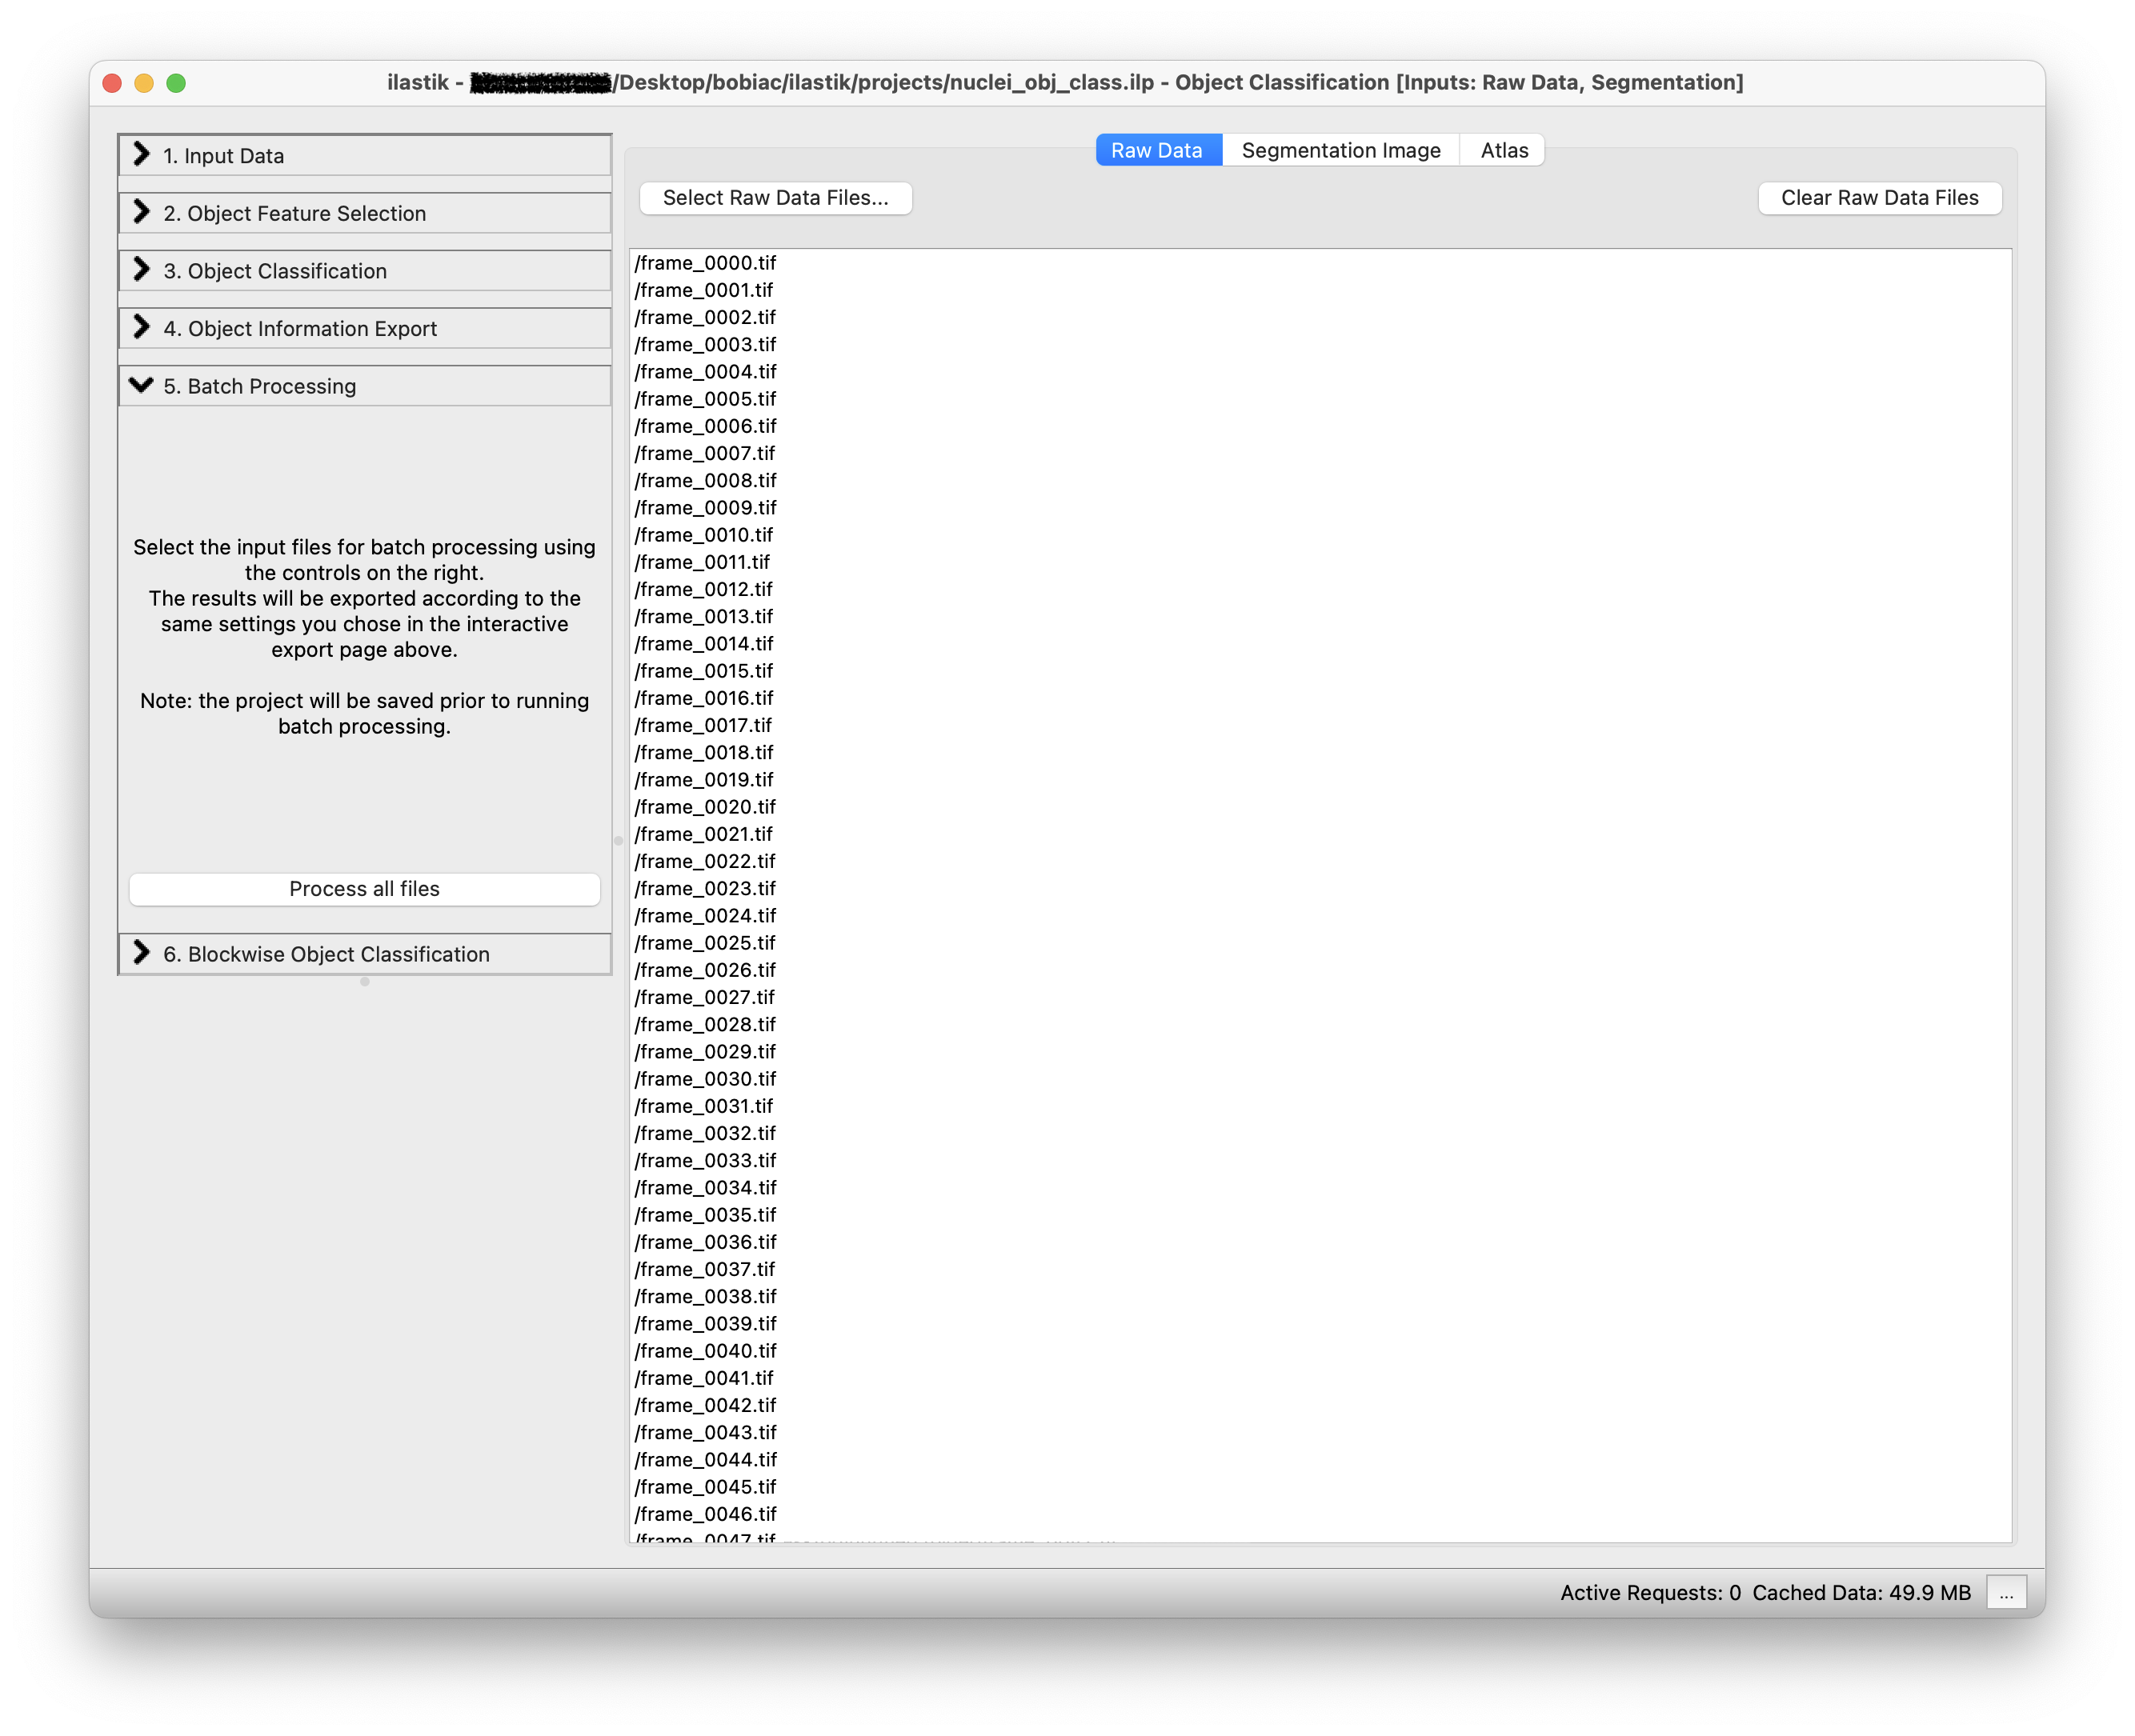
By clicking on the Process all files button, the classifier will be run on all the images in the dataset and all the nuclei will be classified as mitotic or non-mitotic.
7. What’s Next?#
The output of this classifier is very similar to the one we obtained in the Pixel Classification section. However, instead of pixel-wise predictions, we have object-wise predictions. In these images, each nucleus that has been classified as mitotic will have a value of 1, while each nucleus that has been classified as non-mitotic will have a value of 2. You could use this information to then analyze cells based on the cell cycle stage.