Retraining Cellpose on Custom Data#
Overview#
In this section, we’ll walk through how to retrain Cellpose on your own data. This is useful when the default models don’t perform well on your specific cell type, staining method, or imaging modality.
Retraining allows Cellpose to learn directly from your examples—leading to better segmentation accuracy and more relevant masks for your experiments.
We’ll cover:
Preparing your training data (images + label masks)
Mounting your Google Drive to access files
Setting training parameters
Running the training process
Evaluating the new model on test images
💡 You’ll need pairs of raw microscopy images and their corresponding label masks. If you haven’t labeled your images yet, we recommend using the Cellpose GUI to draw or edit masks manually before starting.
The dataset we’ll use here can be downloaded below. It includes both training and test images: Cellpose Training Dataset
⚠️ Note: This notebook is designed to run in Google Colab. If you want to run it locally, you may need to adjust some paths and install the required packages.
Make sure you have GPU access#
To Enable GPU:
navigate to
Runtime -> Change Runtime Typeselect
Python 3asRuntime Typeselect one available GPU (e.g.
T4 GPU) asHardware accelerator.

Mount your google drive#
To access the data for the course you first need to mount your Google Drive.
Run the cell below to connect your Google Drive to colab and follow the instructions to authenticate your Google account.
You will need to allow access to your Google Drive so that the notebook can read and write files.
from google.colab import drive

drive.mount("/content/drive")
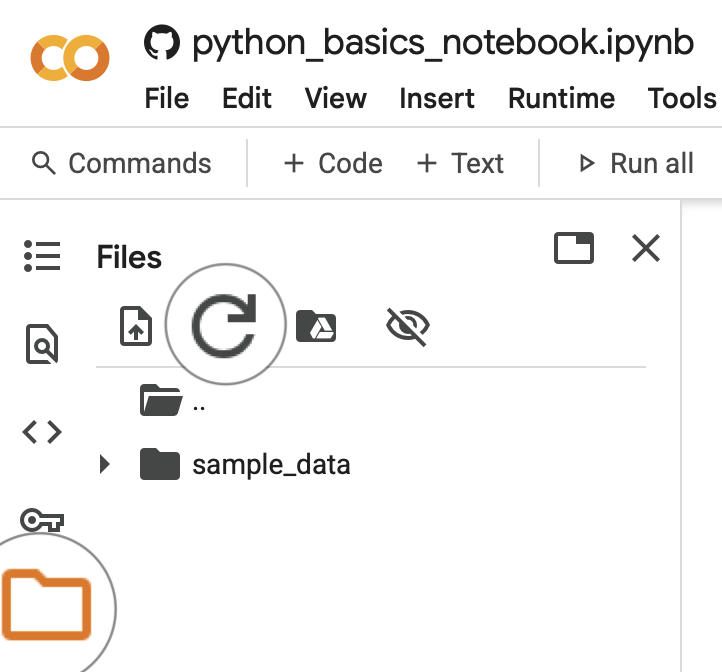
Then click on folder icon on the left bar, press the refresh button. Your Google Drive folder should now be available here (e.g. MyDrive).
Download the Data#
Run the cell below to download the data for this exercise and save it in you Google Drive. A new folder called bobiac_data_cellpose will be created in your Google Drive.
# Create directory
!mkdir -p /content/bobiac_data_cellpose
# Download the data
!wget https://raw.githubusercontent.com/HMS-IAC/bobiac/main/_static/data/05_segmentation_cellpose_training.zip -O /content/bobiac_data_cellpose/05_segmentation_cellpose_training.zip
# Unzip the data, remove zip file and macOS metadata files (if any)
!cd /content/bobiac_data_cellpose && unzip 05_segmentation_cellpose_training.zip && rm -f 05_segmentation_cellpose_training.zip && rm -rf __MACOSX
Install Cellpose#
# !pip install cellpose
Import Libraries#
from pathlib import Path

import numpy as np
from cellpose import core, io, metrics, models, train
Setup#
io.logger_setup()  # to get printing of progress

use_gpu = core.use_gpu()
print("GPU available:", use_gpu)
Data Handling#
For training, Cellpose expects:
A folder of raw images (e.g., TIFF or PNG)
A matching folder of masks, where each mask corresponds to an image and contains labeled regions
You’ll also need to split your data into a training set and a test set. This allows the model to learn from one portion of the data, and then be evaluated on a separate portion it hasn’t seen before.
✅ The images and masks must have the same filenames (e.g.,
img001.pngandimg001_masks.png) so Cellpose can pair them correctly.
During training, Cellpose will:
Load batches of training images
Compare its predictions to the ground-truth masks
Adjust itself (via backpropagation) to reduce errors over time
Keep your training and test folders organized and double-check for any mismatches.
ROOT_FOLDER_PATH = Path("data/05_segmentation_cellpose/retraining")

train_dir = ROOT_FOLDER_PATH / "train"
test_dir = ROOT_FOLDER_PATH / "test"

masks_ext = "_seg.npy"

# get files
train_data, train_labels, _, test_data, test_labels, _ = io.load_train_test_data(
    train_dir, test_dir, mask_filter=masks_ext
)
# Convert images to float32
train_data = []
for img in train_data:
    train_data.append(img.astype(np.float32))
# same as using list comprehension:
# train_data = [img.astype(np.float32) for img in train_data]

# Convert labels (masks) to int32
train_labels = []
for lbl in train_labels:
    train_labels.append(lbl.astype(np.int32))
# same as using list comprehension:
# train_labels = [lbl.astype(np.int32) for lbl in train_labels]

# Convert test images to float32 and labels to int32
test_data = []
for img in test_data:
    test_data.append(img.astype(np.float32))
# same as using list comprehension:
# test_data = [img.astype(np.float32) for img in test_data]

# Convert test labels (masks) to int32
test_labels = []
for lbl in test_labels:
    test_labels.append(lbl.astype(np.int32))
# same as using list comprehension:
# test_labels = [lbl.astype(np.int32) for lbl in test_labels]
Init the Model#
Before we can train a new model, we need to initialize Cellpose with the correct settings.
Here, we’ll:
Specify the model type (e.g., “cpsam” (default), “cyto” or “nuclei”) to use as a base model
Set the channels depending on how your images are structured (e.g., single-channel grayscale, or dual-channel with nuclei and cytoplasm)
Choose where to save the model weights during training
💡 Even when training a new model, Cellpose builds on a pre-trained backbone (unless you explicitly start from scratch). This helps it learn faster and perform better—especially on small datasets.
# Initialize the Cellpose model
model = models.CellposeModel(gpu=use_gpu, model_type="cpsam")
# run model on test images
masks = model.eval(test_data, batch_size=32)[0]

# check performance using ground truth labels
ap = metrics.average_precision(test_labels, masks)[0]
print(f"\n>>> average precision at iou threshold 0.5 = {ap[:, 0].mean():.3f}")
Train New Model#
Now we’re ready to train! In this step, we’ll tell Cellpose to:
Use the training images and masks
Save the trained model to your specified directory
Run for a defined number of epochs (iterations over the full dataset)
You can also set other options like:
Learning rate
Batch size
Whether to use GPU
💡 Training time will vary depending on your dataset size and hardware. On Google Colab with a GPU, small datasets may train in just a few minutes.
After training, the model weights will be saved and ready to use for predictions. We’ll evaluate performance on the test data in the next step.
model_name = "new_model"

# Training params
n_epochs = 10
learning_rate = 1e-5
weight_decay = 0.1
batch_size = 1

# (not passing test data into function to speed up training)

new_model_path, train_losses, test_losses = train.train_seg(
    model.net,
    train_data=train_data,
    train_labels=train_labels,
    batch_size=batch_size,
    n_epochs=n_epochs,
    learning_rate=learning_rate,
    weight_decay=weight_decay,
    nimg_per_epoch=max(2, len(train_data)),  # can change this
    model_name=model_name,
)
Evaluate on test data#
model = models.CellposeModel(gpu=True, pretrained_model=new_model_path)

# run model on test images
masks = model.eval(test_data, batch_size=32)[0]

# check performance using ground truth labels
ap = metrics.average_precision(test_labels, masks)[0]
print(f"\n>>> average precision at iou threshold 0.5 = {ap[:, 0].mean():.3f}")